
Things to Make and Do
The One Thousand Thousand project is not just some absurd effort to try and create a million paintings. Especially not just for the sake of doing it. The whole project was sort of an aside that came about after consistently working on a creative exercise that began back in high school. It was a way for artists to explore new techniques and ideas and mediums. It's a way for you to unstick yourself when you're feeling uninspired.
If you're interested in participating in the One Thousand Thousand project then that's where you should start out too. [Not high school but from the point of view as seeing it as a way for artists to explore new techniques and ideas and to unstick you when you're feeling stuck and uninspired.]
If you're interested in participating in the One Thousand Thousand project then that's where you should start out too. [Not high school but from the point of view as seeing it as a way for artists to explore new techniques and ideas and to unstick you when you're feeling stuck and uninspired.]
We’d like to share this project with other artists. If you’d like to participate in the project by having your own pieces included as part of this edition then that’d be really terrific. If you’d like to collaborate with us in some way, large or small, that'd be great too. Or if you’re an artist and you just want to try doing something similar as a creative exercise on your own that’s fine too. The main idea is that we truly do want to share what we're doing with you.
This page is intended as a basic primer on how to make a few hundred [or even a few thousand] paintings of your own. It's an early attempt to give you at least a decent idea of the general process we typically use to create some of the pieces in the One Thousand Thousand project.
If you are interested in contributing your own work to be included as part of the One Thousand Thousand project then there are a few standards that we'd need you to kind of stick to. Some of those are described below. As always, if you have questions or comments it would be really cool if you were to let us know.
Materials + Supplies
You can find alternatives to these for sure. This is just what we've settled on using over the years.
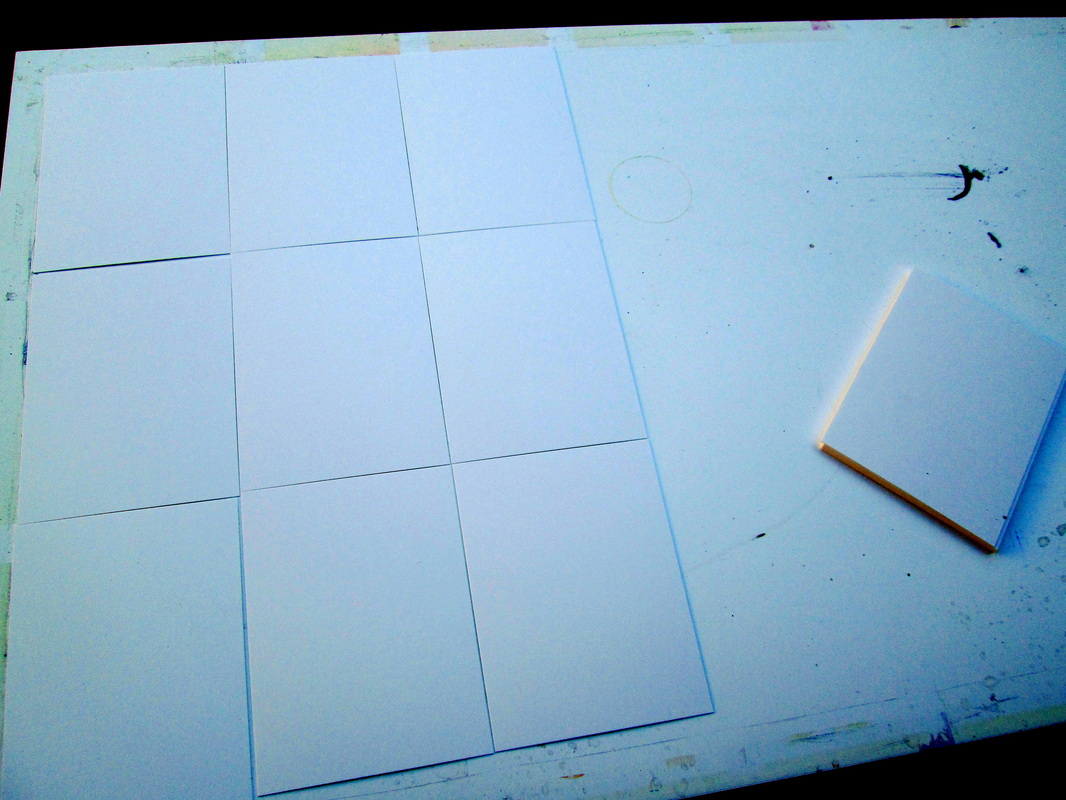
- Comic book backing boards
[Available in any comic book shop or online too probably.] Ultimately the size of these is unimportant. Originally we used to make our own out of discarded card stock and stumbled onto the comic book backing boards as a terrific option. More often than not we use the Silver Age size and not the Modern or Current size. For the sake of maintaining some continuity in the project let's just all use the Silver Age size. They are sold in packs of 100 which, when cut in half, give you material for 200 pieces for about $10. - Painters tape
You get what you pay for in this department and the ideal choice would be the kind for Super Delicate Surfaces. It's more expensive than plain old masking tape but it's very much worth it in the long run as it won't ruin your work when you are removing the tape. The width of the tape tends to vary depending on the manufacturer and you should use a size that is about 1" wide. [For whatever reason an industry standard size seems to be .94" and this is the size we use most frequently.] - Art supplies galore
Think mixed media for sure. Whatever you have around to use is okay. Go crazy.
We've added a Materials + Supplies page that goes into a whole lot more detail about the materials and you're encouraged to check that out too.
Setup + Staging
Now that you have your supplies you’ll get your work surface ready. Any size table is okay. Flat surface of any sort will do. Kitchen tables, kitchen counters, desks, coffee tables, workbenches, whatever. A giant piece of cardboard will work too and is cool to try as it's portable.
You’ll align a grid of cards together making sure they are squared up. Use as many as you’d like or that can fit on the surface. The dream set-up is a giant studio space with 4’x8’ plywood sheets on sawhorses. A couple of those. You can do hundreds of pieces at the same time and it’s awesome.
You’ll align a grid of cards together making sure they are squared up. Use as many as you’d like or that can fit on the surface. The dream set-up is a giant studio space with 4’x8’ plywood sheets on sawhorses. A couple of those. You can do hundreds of pieces at the same time and it’s awesome.

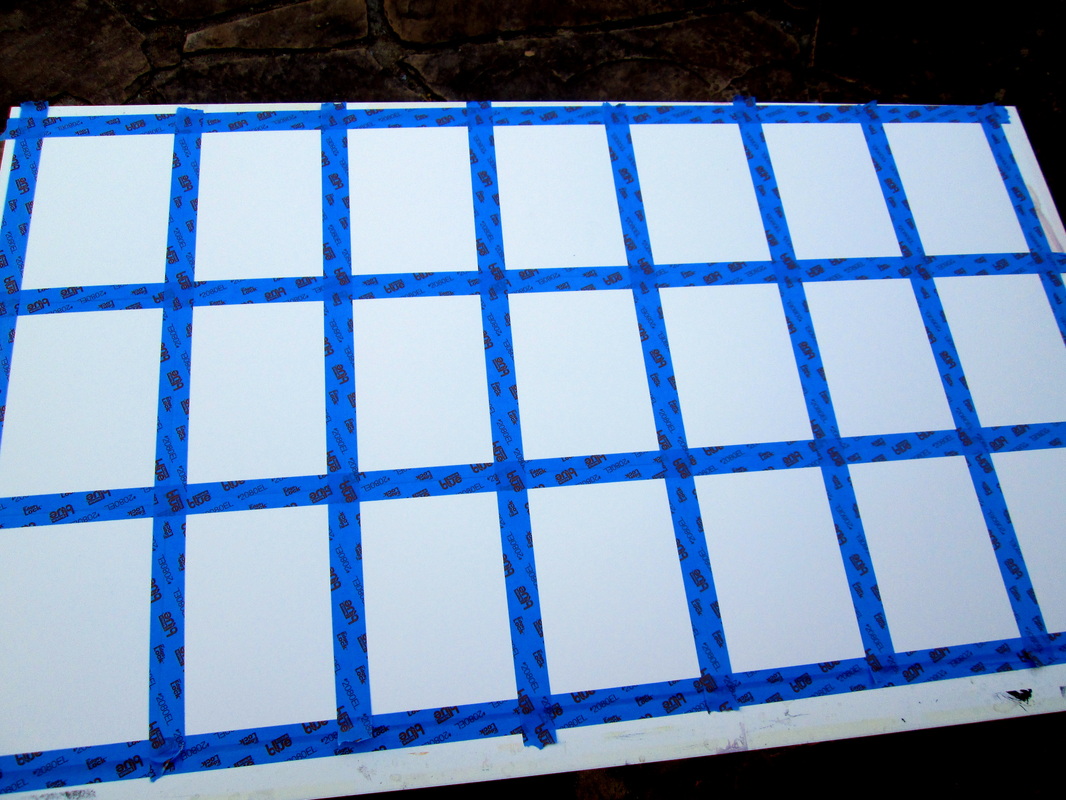
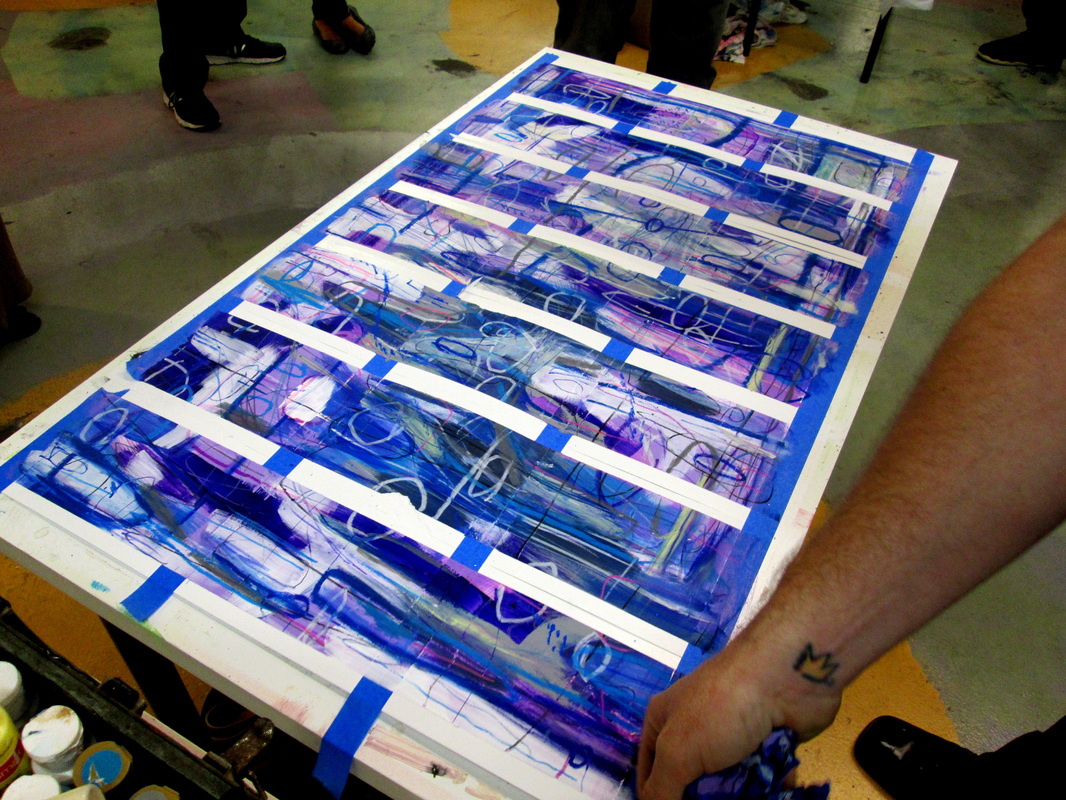
Lay out the pre-cut boards edge-to-edge on your work surface in a tight grid. Don't start your grid of cards right at the edge of the table. Make sure to keep some room on the outside edge of the grid as you'll need to have room for the tape. Then tape off the edges using the painters tape. The tape joins two rows or columns of cards together exactly along their shared seam. Do all of the rows first or all of the columns first. It's easier to remove the tape later.
This taping process allows for the finished pieces to maintain about a 1/4" to 1/2" white border around the outside edges.
This taping process allows for the finished pieces to maintain about a 1/4" to 1/2" white border around the outside edges.
|
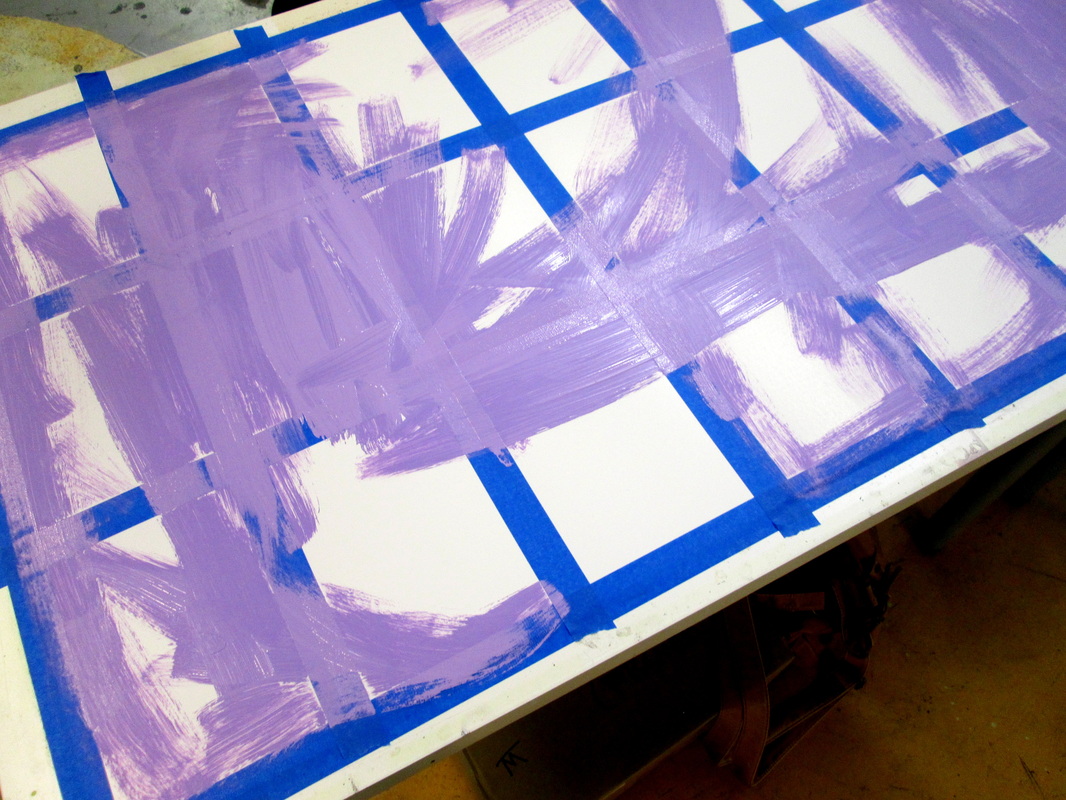
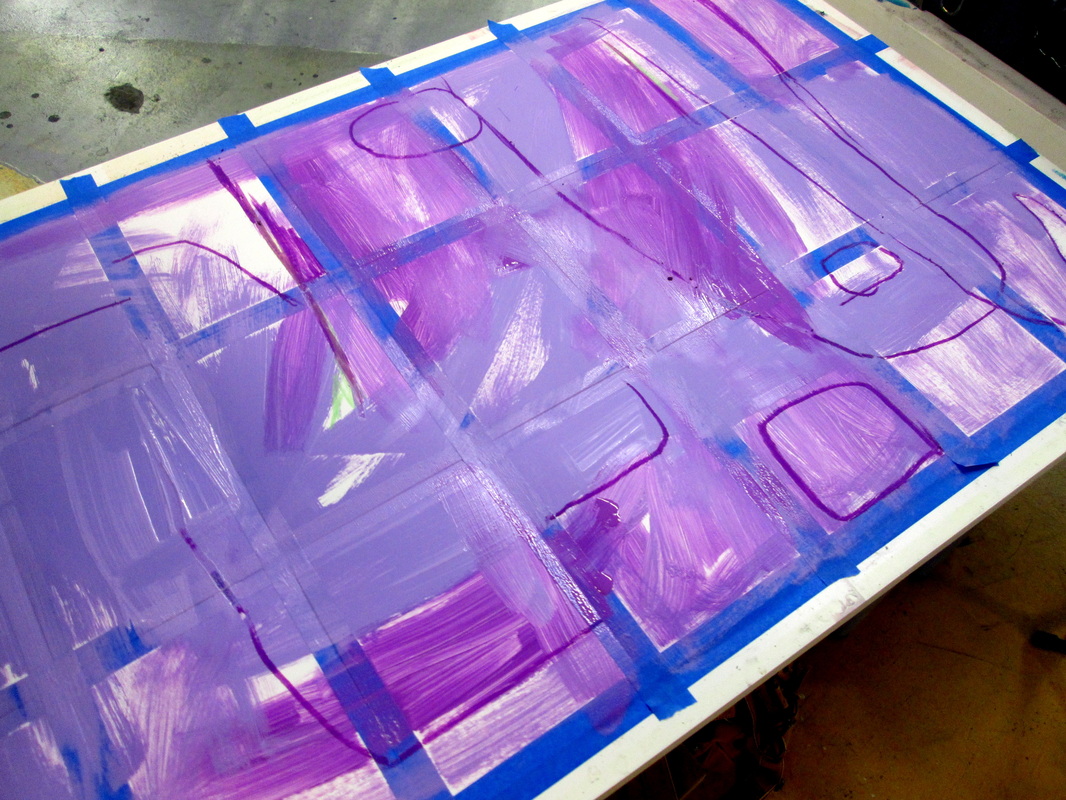
Once you've got your taped off grid ready you can begin with your first layers of color. We typically just dump out a nice layer or two of paint just to get things started. Don't think too much. Get moving.
TIP: The cards we use have one side glossy and slick and the other a more matte and porous surface. Choose your sides depending on your medium. The matte surface is ideal for more delicate materials like watercolor, pencil, chalk and ink. The porous surface accepts these materials well. The glossy side is more suited for heavier loads of paint. As it's glossy and coated you may have to prime them in some way or some materials won't adhere properly. The glossy side also allows for the tape to be removed a lot easier. |
|
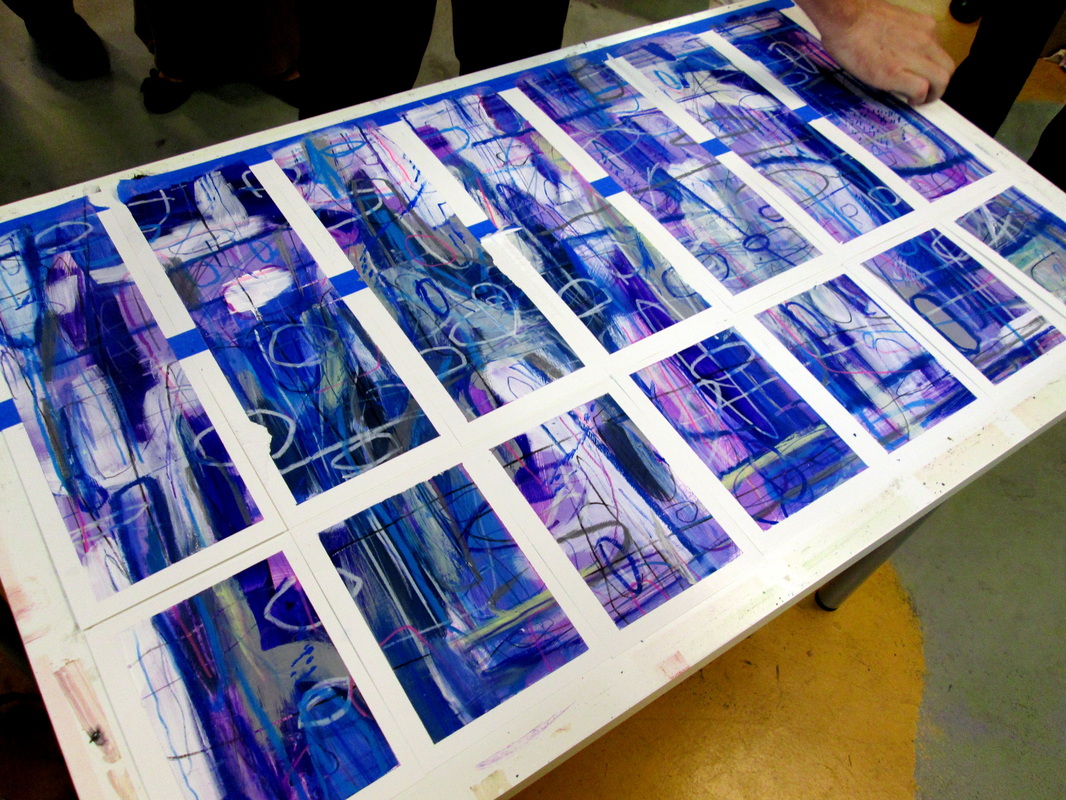
Early on in the project we adopted a stance that it was ideal to view the entire set as one whole piece as opposed to, say, 25 individual pieces. A goal was to almost remove any indication of the lines that were defined by the blue tape. To not work within the confines of the lines, as it were. This is still how we approach most any given set. Think of it as one large piece and stop yourself from babying any one particular section.
If the whole set in overview looks pleasing then the individual pieces comprising that set will also be. It's kind of a Rule of Thirds thing. |
|
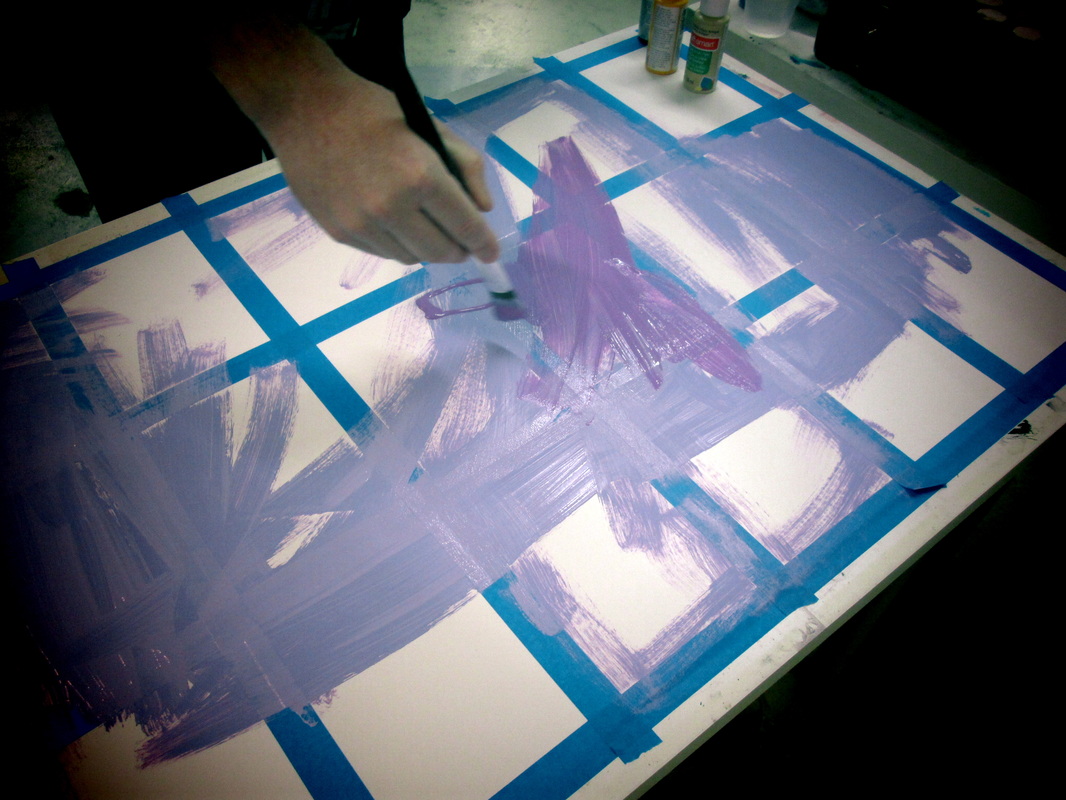
Begin adding more layers of color and use additional materials. In this example we've laid down a base of two shades of purple and then added a darker purple using oilsticks.
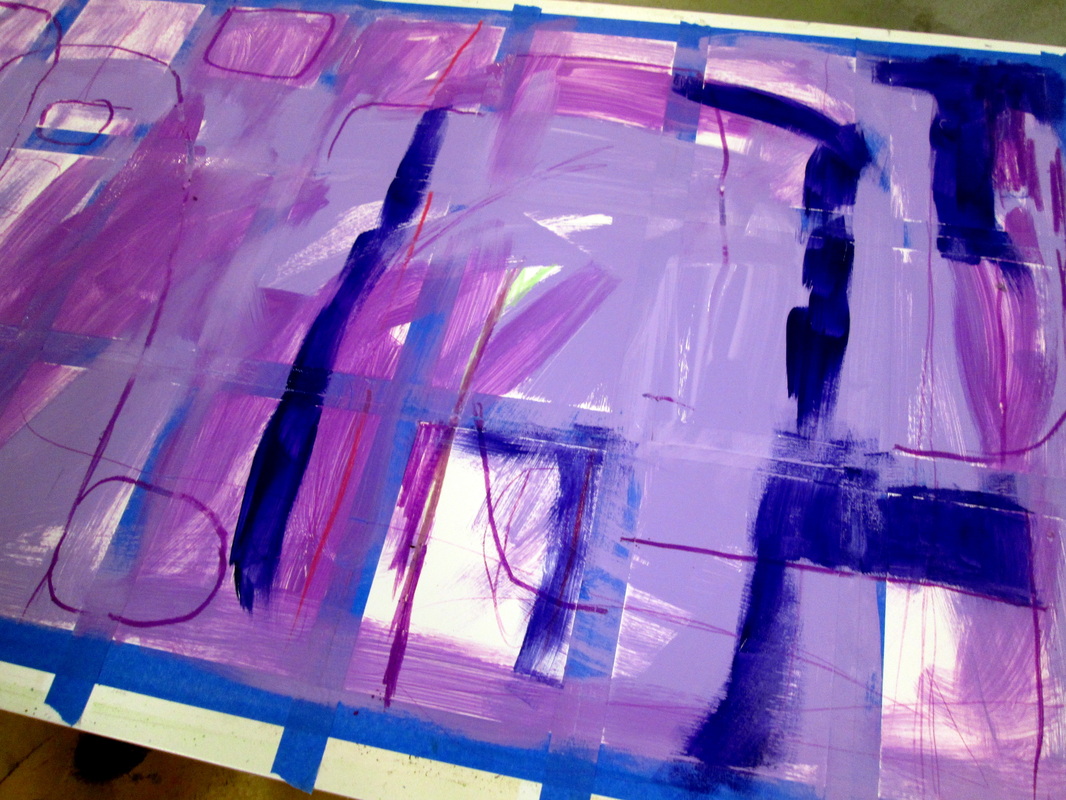
TIP: Switching between mediums allows for the paint to dry and the pieces to not get too muddy. We frequently tend towards a rotation of paint then pastels or oilsticks followed by pencils. Then repeat those throughout. |
|
|
Additional layers are added and eventually you'll get to a point where you're starting to like where things are going.
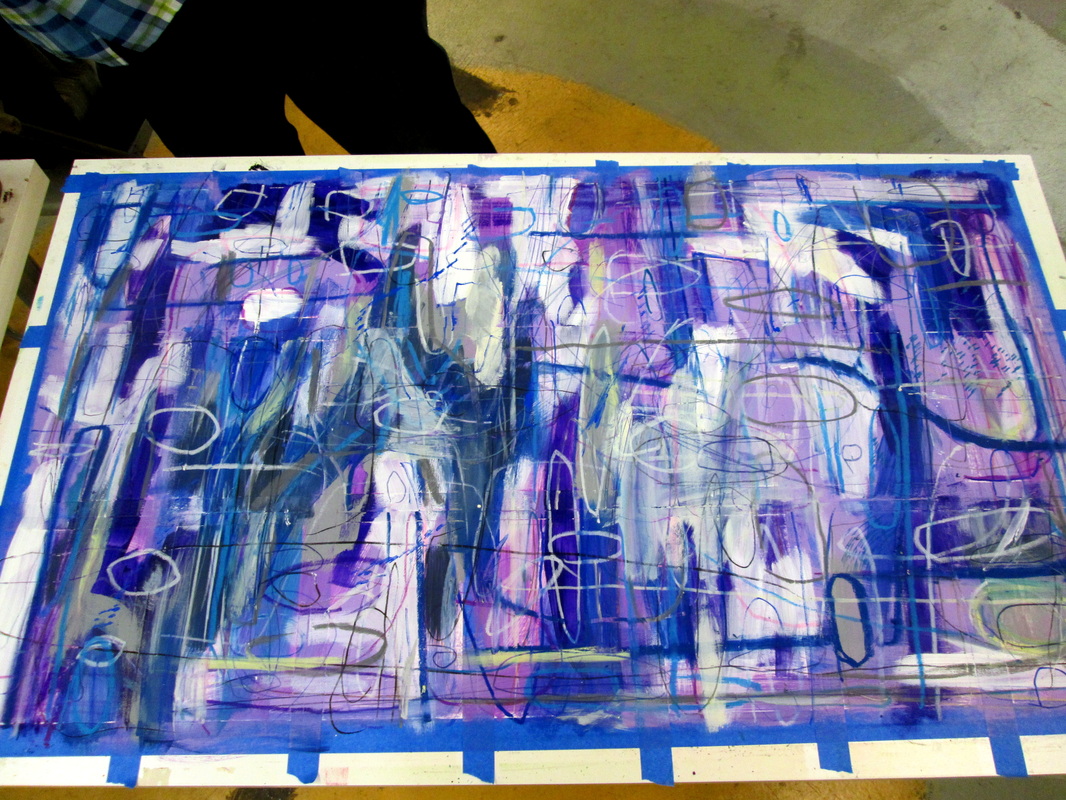
TIP: You should ideally move around the surface as you are working. If you're not able to walk around the surface completely you should certainly try and work from as many varied points as possible. Look at the group from different angles. If things look terrific upside-down then they'll look the same the other way around too. [This is very much akin to a now-famous drawing exercise by Betty Edwards.] Anyway, the point in all of this is as a creative exercise. Develop your own artistic abilities in some way. [More on this.] Keep working towards not 'seeing' the blue tape grid at all. Ignore your impulse to work on a specific section or piece. None of the individual pieces should be treated as a darling. This is Big Picture stuff here. |
|
|
One of the biggest challenges in this process [and probably any creative process for that matter] is knowing when to stop. It's incredibly easy to overwork things and when you're working on smaller pieces it's even easier to do. A little goes a long way. Less is more.
Don't strive for perfection. Don't over-analyze the end result. That's one of the problems that working on such a project is geared towards eliminating in the first place. So don't bring your same old neurosis or hang-ups to the table. You're encouraged to let things get to a point where you look at it and question the possibility of things ever turning out okay. Be unsure of the results and resign yourself to just see how things go. Let it all be questionably messy. |
|
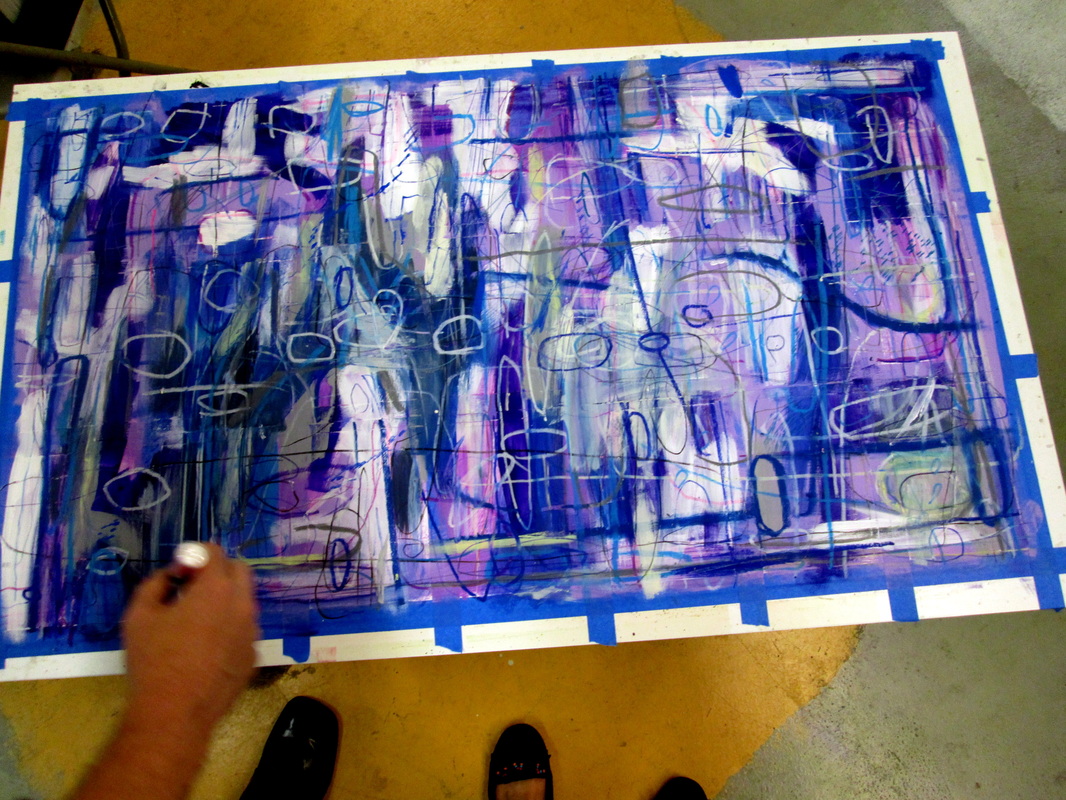
As the final overview piece comes close to being finished it's nice to do a final review of things. In this final stage you can officially scan over the individual pieces as defined by the taped boundaries.
Ultimately you are making a group of individual pieces and it is important that they look solid on their own. That said, some pieces may not have received enough attention and may look a bit incomplete in some way. In our experience the outside edge pieces do tend to receive less attention during the process and it's good to be mindful of those perimeter pieces. Fix these areas up by adding a few more final details. |
|
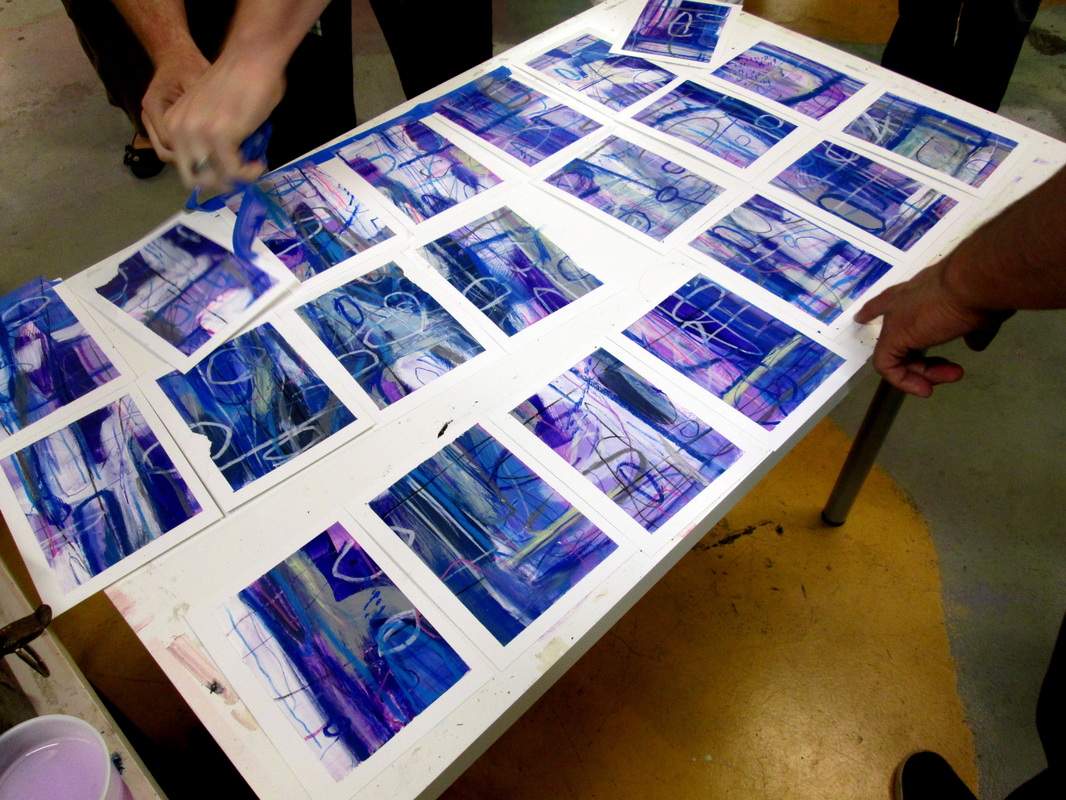
After the group has been wiped clean of any excess materials and the paint has been given enough time to dry then begin to remove the tape. This is the most fun part for sure.
Be careful not to just yank away the tape as it's very easy to rip the things. Especially depending on the materials you've chosen. Really wet paints and inks can warp the cardstock. Take your time on this part. |
|
|
You'll begin to see how the individual pieces have emerged from the whole of the group. It's pretty remarkable.
|
|
|
When you see the results you'll be amazed. Your friends will be too.
The only thing left to do is to decide on which way to orient the pieces and then add the date of completion and then assign each piece a unique number as part of the edition. Be sure to take photos of the finished group and document the pieces in some way. Scanning each piece is ideal. Repeat this process as often as you can. Invariably some of the pieces will still need a little more work and you can spend some time with each individual piece using whatever medium you prefer. |
